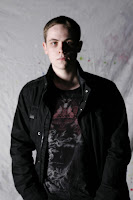
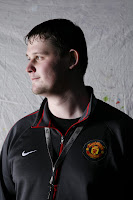
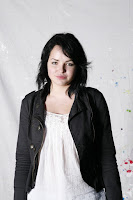
Im glad to see that some of the work that I did for Luvstuff is hitting the Internet hard.
http://www.facebook.com/event.php?eid=139906709373710
&
http://www.facebook.com/pages/Luvstuff/196776243565
Ex
Total Pageviews
Friday, 8 October 2010
Thursday, 7 October 2010
Outside Portraiture
Good Evening To Whom It May Concerners,
Today - I learnt how to take effective photos with lighting equipment (outside).
The equipment it self, is pretty simple and basic to set up. For all those interested, we used Bowens, Gemini lights.
Here are the settings we used:
- ISO: 100
- Flash: 1/16
- Aperture: 5.6
If the pictures were too dark, were were able to change the ISO higher and decrease the shutter speed.
The pictures in the previous blog, there are pictures of the lovely Diana would voluntarily helped us out as a model. Here are some more of the pictures:
Tuesday, 5 October 2010
Night Shots: Slow Shutter Speed
Bonjourno All,
The Statues Fair was in town last night (which then moves to Nottingham to join the infamous Goose Fair) so I thought it would be a great opportunity to capture some slow-shutter shots with motion blur.
I used the following equipment and settings:
Equipment:
The Statues Fair was in town last night (which then moves to Nottingham to join the infamous Goose Fair) so I thought it would be a great opportunity to capture some slow-shutter shots with motion blur.
I used the following equipment and settings:
Equipment:
- 1x DSLR Camera
- 1 x Tripod
- 1 x Camera Assistant
- 1 x Slice of Carrot Cake
Settings:
- I originally set my aperture at F22, and lowered this if my images were too dark.
- ISO: 100
- And with these settings; I then chose how long my shutter speed was going to be. I generally picked around 15-20seconds.
So here are the eagerly anticipated images, which have had a bit of liposuction and botox.
Push It
Here is just a picture that I took of my Salt and Pepper shakers yesterday. Did some basic editing and now I think it looks quite effective. Thought i'd share.
E x
Light Drawings
Dear all,
Here are some light drawings that I created just the other night. It took me a while to get everything set up (with the right apperture/lighting) but once I got going it was all good. After a few practices are some; what can only be described as 'poor' attempts, myself and William came up with some good ideas and we swiftly put them into practise.
If you're genuinely interested in Light Drawings and you're thinking to yourself, 'how does that clever lad Eoin do those?' then i'm going to tell you in these easy to follow, step-by-step guide to Light Drawings:
- You will need 2 or more people
- 1x Camera
- 1x Tripod
- 1x Torch
- 1x patience and creativity.
After you have successfully assembled your team and equipment you're ready to go!
- You need to set your camera to 'BULB' this can be found at the bottom of the Shutter Speeds.
- Please camera on Tripod and sort out your surroundings.
- After this, you will need one person to HOLD DOWN the Shutter [button] whilst the other(s) are creating the Light Drawing.
- The people creating the image will need to have a torch and be aware that they don't want to get themselves into the picture! They will also need to move the torch around quite slowly to gain a better quality image.
- When the image in complete, simply release the SHUTTER and VIOLA! Your Light Drawing is created!
- Easy Peasy - i'm sure you'll agree.
P.S: You will need to think about what ISO (sensitivity of the film) number the camera is set at. Whilst creating my own images I had the following: BULB, ISO: 100
I hope you find this useful :)
E x
Subscribe to:
Comments (Atom)


